


Welcome back to Poceti.Today, we’ll explore one of the most charming crochet textures — the bobble stitch! Whether you’re making a cozy blanket, a playful pillow, or simply exploring texture, bobble stitches add irresistible dimension to your project.
Let’s break it down together — slowly, simply, and beautifully.
What Is a Bobble Stitch?
A bobble stitch is a cluster of stitches worked into the same spot, creating a “bump” or “bubble” that pops off your fabric. It’s perfect for adding whimsy and texture, and once you learn the rhythm, it’s wonderfully meditative.
Before diving in, make sure you're comfortable with the basics like chain stitch and single crochet. These form the foundation of today’s pattern.
Materials You’ll Need
- Worsted weight yarn
- A corresponding hook (typically 5.0 mm / H hook)
- Scissors
How to Crochet the Bobble Stitch
Step 1: Create a Foundation Chain
For beginners, chaining 20 is a good place to start.
Not sure how? Visit our Chain Stitch Tutorial first.
Step 2: Work a Single Crochet Base Row

Turn your work and make 1 single crochet (sc) into each chain across.
This will give your bobbles a flat and stable foundation to “pop” from.
Need help with single crochet? Here’s our guide.
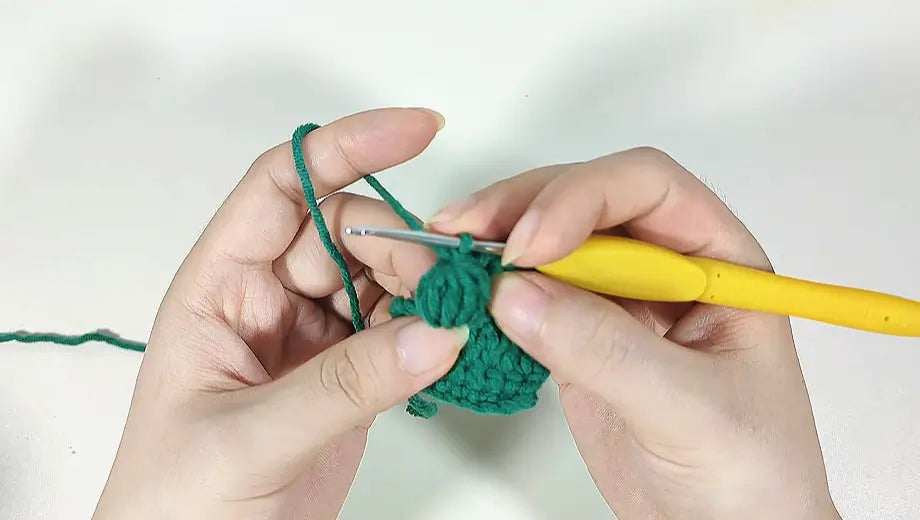
Step 3: Yarn Over and Insert Hook

Yarn over (YO) and insert your hook into the stitch where you want the bobble to be. You’ll start by adding extra loops into the same stitch.
Step 4: Pull Up a Loop
Yarn over again and pull up a loop, so now you have 3 loops on your hook.
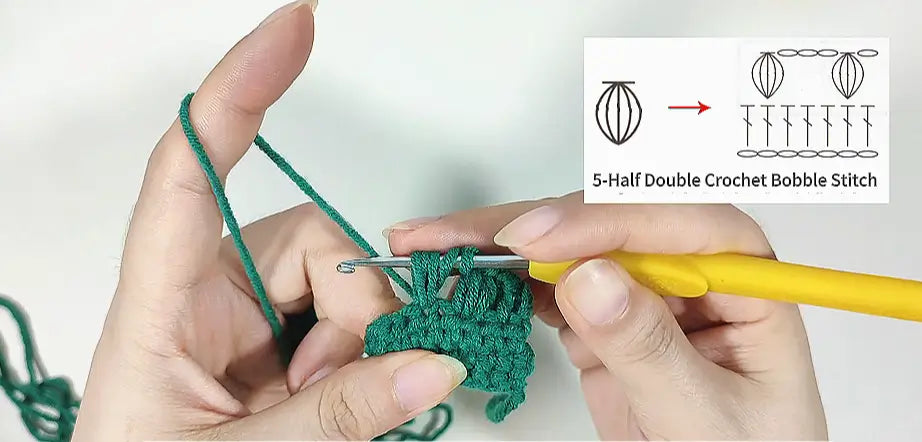
Step 5: Pull Through Two Loops
Yarn over and pull through 2 loops, leaving 2 loops remaining on the hook.
Step 6: Repeat the Process
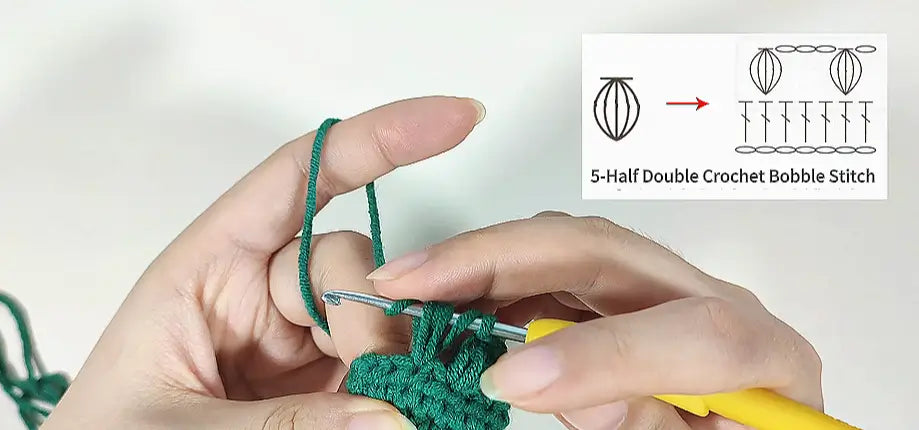
Step 7: Complete the Bobble
Yarn over and pull through all 6 loops on your hook to finish the bobble.
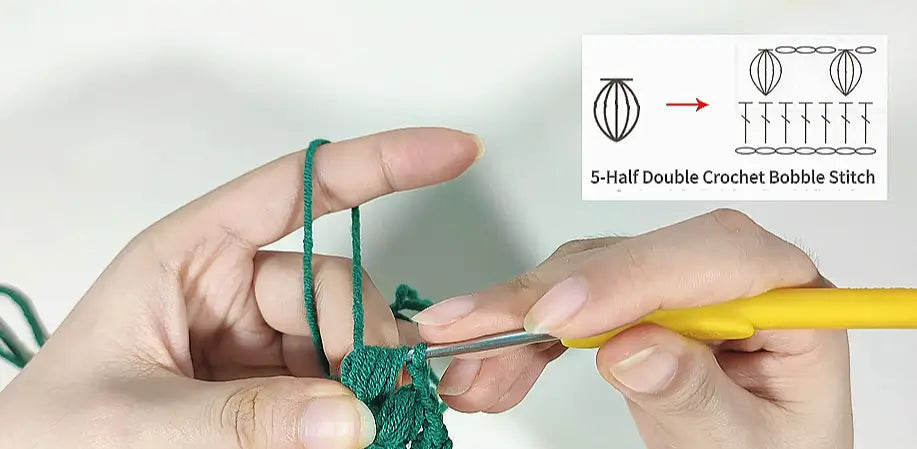
Step 8: Secure the Bobble
Step 9: Repeat
On the next row, you can work a full row of sc, or stagger your bobbles to create a dotted texture.
Stitch Placement Tip
Bobbles will pop to the back of your fabric.
If you want them facing forward, make bobble rows on the wrong side (back side) of your project.
Watch our video tutorial
FAQ: Bobble Stitch Crochet
What projects are bobble stitches good for?
Is the bobble stitch hard to learn?
Will the bobble stitch affect the softness of my project?
How do I fix mistakes with bobble stitches?
Are there different types of bobble stitches?
Conclusion: Mastering the Bobble Stitch
Now that you’ve learned how to crochet the bobble stitch, it’s time to add this fun and textured technique to your projects! Whether you’re working on a cozy blanket or a unique accessory, bobbles can make your work stand out. Keep practicing, and soon you’ll be incorporating bobbles seamlessly into your crochet designs.
Be sure to explore more of our crochet tutorials and expand your skills with our full crochet guide collection.
